
AI Object Remover FREE No sign-up required Remove Object From Photo

FREE No sign-up required

Keep the moment. Clear the distraction. Select an unwanted object, let AI fill the space, and make your favourite photo the focus again.

Working image

Upload an image to begin.

How to use AI Object Remover

Go from a photo with a distraction to an edit you can compare and save. Select, review, and keep editing in one workspace, with the picture right in front of you.

  1. Bring the photo you love

    Choose a JPG, PNG, or WebP image, or drop it straight into AI object remover. To remove an object from a photo you otherwise love, start with the shot where the expression, lighting, or scenery already feels right. Try free edit across supported tools without signing up. Sign up for free credits to keep editing.

    Choose your photo
  2. Mark the distraction

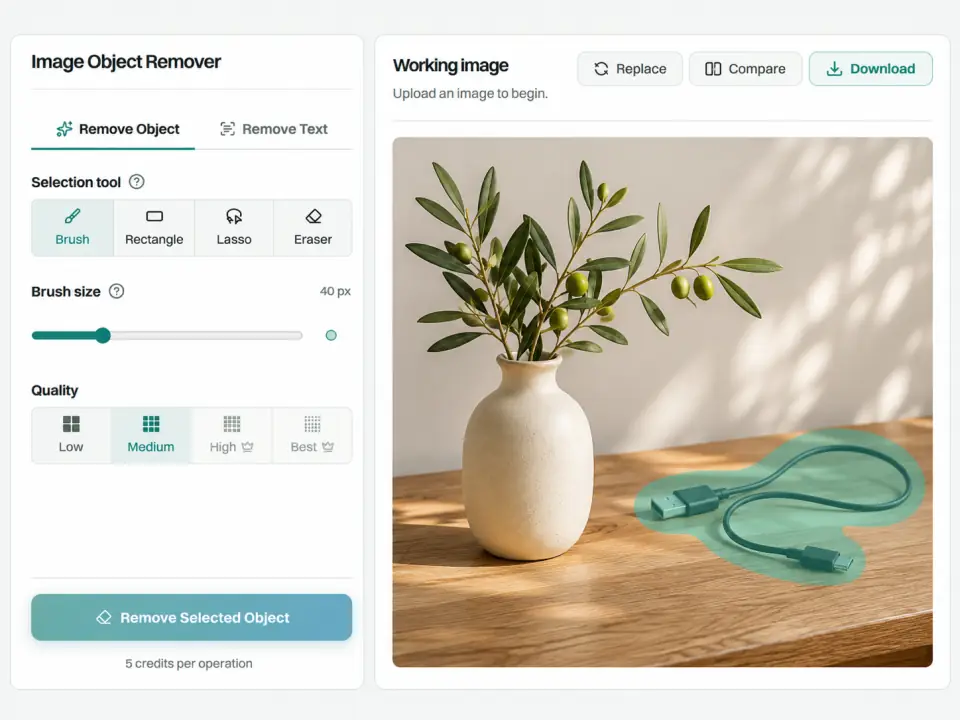
    Paint over the unwanted area with Brush, drag a Rectangle around it, or trace its outline with Lasso. The coloured selection shows what you have marked. Adjust the brush size for the area, use Eraser to unmark anything you want to keep, and undo or redo a selection until it looks right.

    Make a selection
  3. Let AI fill the space

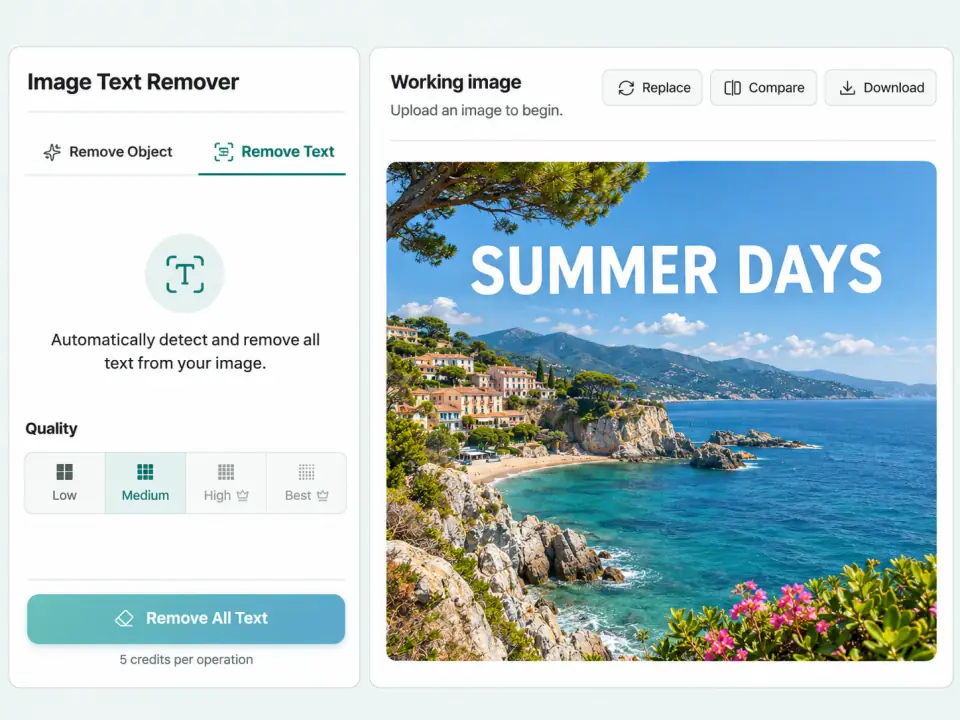
    Choose your removal quality and click Remove Selected Object. AI Object Remover uses your marked area and the surrounding photo to fill the space left behind. There is no prompt to write. If words are the distraction, switch to Remove Text and use Remove All Text without drawing a selection.

    Remove object from photo
  4. Review, refine, and save

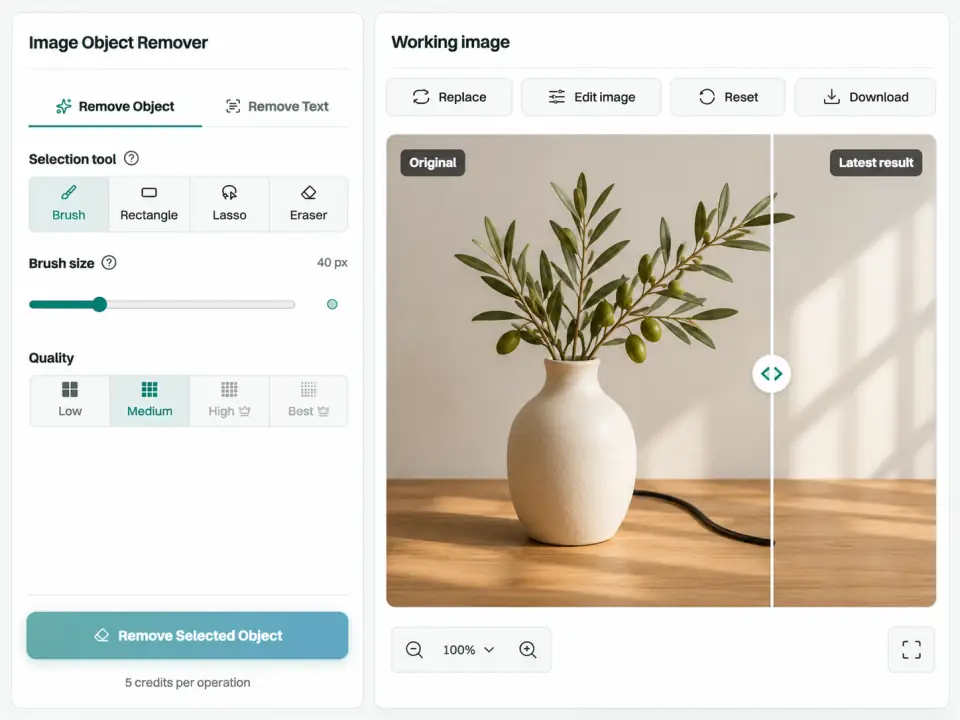
    Compare your latest AI Object Remover result with the original upload, then return to editing if another detail catches your eye. A successful result becomes your working image, ready for another cleanup pass. Download when you are happy with the photo, or use Reset to return to the original and take a different approach.

    Try the editor

AI Object Remover examples

Think about what you want the viewer to notice first. Explore these everyday cleanup ideas, then bring a photo of your own into AI Object Remover.

The view you came for

A passerby at the edge of a holiday photo can pull attention away from the person you photographed. Select that distraction with AI object remover and make room for the portrait and the view. Slide across the comparison to inspect the same scene before and after the edit.

Remove a photobomber


Let the object stand out

A mug, loose cable, or stray accessory can compete with the item you meant to show. Select the extra object to remove it from the photo, then review the space it leaves behind. This is a useful place to start when you already like the angle, lighting, and arrangement of your photo.

Clear tabletop clutter

More scene, less signage

An unwanted sign can interrupt an otherwise inviting garden or street scene. Select the whole sign when you want the object removed. If you want to remove lettering instead, explore the separate Remove Text mode. Choose the edit that fits the photo you have in mind.

Remove an unwanted sign

What AI object remover offers

Choose what to clear, see how the picture changes, and carry on from the result. The workspace gives you different ways to approach the same photo.

Object removal editor showing a brush selection over a cable and controls for refining the marked area

A selection that fits the distraction

A thin cable and a broad background object call for different ways of marking an area. AI object remover lets you switch between Brush, Rectangle, and Lasso while working on the same photo. Before you remove an object from your photo, adjust the brush size or use Eraser to refine your selection. You stay in charge of which areas to mark, whether you are tidying one corner or selecting several distractions for the same removal pass.

Choose what to remove
Text removal mode with an uploaded image and the Remove All Text action ready to use

Give the picture room to speak

When lettering draws attention away from the image, switch to Remove Text in AI object remover. Remove All Text asks AI Object Remover to detect and clear text across the working image, without painting over each word. It is a separate approach from selecting a physical sign or object. Move between text cleanup and object removal as you work toward the version of the photo you want to keep.

Clean up image text
Before-and-after slider comparing the original uploaded photo with its latest object removal result

Keep editing the photo in front of you

You may notice a second distraction after the first one is gone. Continue from the successful result without uploading it again, and use Compare to see your latest edit beside the original photo. Zoom lets you inspect an area more closely; fullscreen gives the picture more room. When you want a fresh starting point, Reset brings back your original upload, while the latest result stays available to compare.

Compare and refine

Everyday uses for AI Object Remover

Start with a photo you already want to keep. A small change can give you another way to use it, from a personal album to your next listing.

Holiday memories

You cannot always wait for an empty viewpoint. Open your holiday photo in AI object remover when the expression and scenery already work, then select an unwanted passerby or stray bag in the background. Save an edited copy for your personal album, a photo book, or a message to the people who shared the trip.

Edit a holiday photo

Portraits worth keeping

A favourite expression can arrive in a busy setting. Use AI object remover to mark a distracting bottle, chair, or background item while keeping your attention on the portrait. Review the edited area alongside your original before downloading a version for your profile, family collection, or next social post.

Tidy your portrait

Product photos with focus

You have found the right light for a handmade piece or a secondhand item, but an extra prop has slipped into the frame. Remove unwanted objects from your product photo by marking the extra prop, then checking the result. Download an edited photo to bring into your listing or layout workflow, with the item itself still the focus.

Focus on your product

Rooms and interiors

A loose cable or forgotten cup can interrupt a room photo you otherwise like. Select the incidental clutter and inspect the result before saving your edit. Use it for a decorating mood board, a renovation diary, or a personal record of the space, without arranging another photography session just for that small distraction.

Clear room distractions

Tips for using AI object remover

Take a moment to get comfortable with the preview and selection controls. These simple workspace habits help you see what you are editing and choose your next action.

Look closer before you mark

AI object remover lets you zoom in for a closer view of an object and its edges. Scroll around the enlarged image, or open fullscreen to give the preview more room. Reset zoom brings you back to the fitted view. These controls help you inspect the selection you are making before you start removal.

Inspect your photo

Check the coloured selection

Before removing an object from a photo, review the coloured overlay to check what you have marked. Adjust Brush size for the area in front of you, and use Eraser if the selection reaches something you want to keep. Undo changes your last selection action; Clear selection lets you start marking again without changing the photo itself.

Refine your selection

Know which version you are viewing

Compare always pairs the original upload with your latest successful result. Return through Edit image to continue working on that result. Reset restores the original as the working image, so Download then saves the original file. Check the working preview before saving to make sure you have the version you want.

Explore the workspace

AI object remover questions answered

How do I remove an object from a photo?

Upload your photo, mark the unwanted area with Brush, Rectangle, or Lasso, and click Remove Selected Object. You choose the area; AI handles the fill. After processing, compare the result with your original and keep editing if there is another distraction you want to address.

Which photos can I upload?

AI object remover accepts one JPG, JPEG, PNG, or WebP image up to 15 MB. To remove objects from a photo, choose a file or drag it into the workspace from your device. The editor shows the image dimensions after upload. Use Replace whenever you want to start a new session with a different photo.

Can I remove a person from the background?

Yes. Mark the person as the unwanted area using the same selection tools you would use for another object. This can help you revisit a travel photo or portrait with a distracting passerby. Compare the edited area with the original to decide whether the result suits your photo.

Can I remove words from an image?

Yes. Switch to Remove Text and click Remove All Text. This mode targets all detected text in the working image, so there is no need to paint individual words. If you want to remove a whole physical sign instead, stay in Remove Object and select the sign itself.

Can I make more than one edit?

Yes. In AI object remover, each successfully loaded result becomes the image for your next cleanup pass. Select another area or switch to text removal without uploading again. Compare keeps the original upload on one side and your latest successful result on the other. Each removal pass is a separate credit-based operation.

What does object removal cost?

Object removal costs 2 credits at Low, 5 at Medium, 8 at High, or 10 at Best quality. High and Best require an active Pro or Max plan. All-text removal costs 10 credits. Anonymous visitors can try free edit across supported tools. Sign in to continue with credits for more editing needs, and visit pricing to explore plans and credits.

Try AI Object Remover

There is a photo you would share if that one thing were out of the way. Bring it into AI object remover, mark the distraction, and take a fresh look at the moment you wanted to keep. Your next edit starts with a photo you already have.

Remove object from photo